Finite Element Analysis of Continuum Structures in Python
Use the Isoparametric Finite Element Method to build an analysis tool for 2D structures in Python.
- You’ll build Python software tools to analyse continuum structures using the Isoparameteric Finite Element method.
- You’ll understand how the assumptions of plane stress and plane strain allow us to analyse 3D structures with 2D models.
- You’ll use open source tools to generate structural models and mesh data that can be analysed with your Finite Element code.
- You’ll learn about von Mises Failure Criterion and Principal Stresses and visualise these across your structures.
Engineers typically start out learning how to analyse rectilinear or cuboid structures. This means we focus on structures that have square or rectangular cross-sections and are prismatic, meaning the cross-section maintains a constant size and shape. This is a great starting point because we can easily build analytical models of the structure’s behaviour. While this serves us well in many cases, in reality we’re often faced with more organic or ‘irregular’ structural forms. This is where finite element analysis can help.
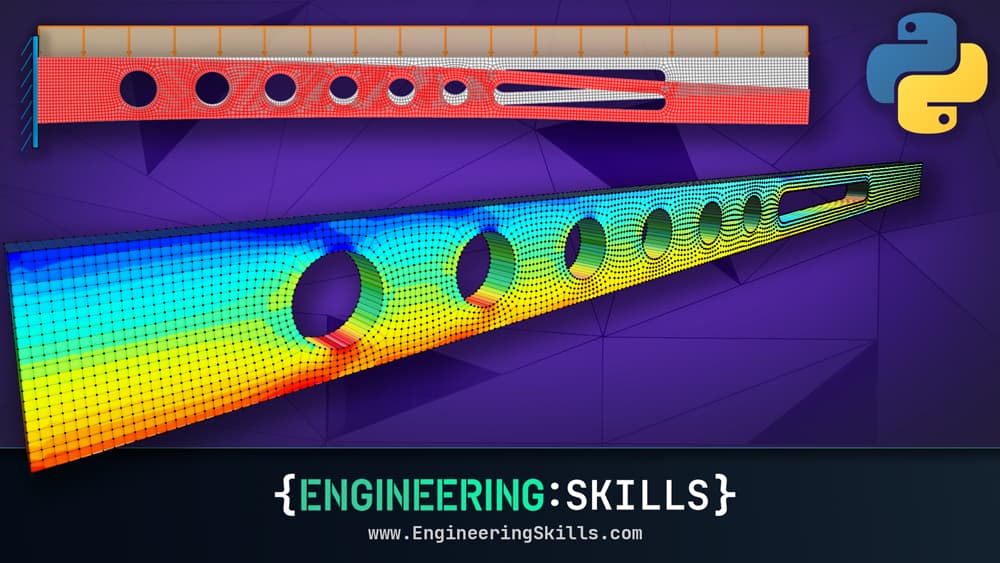
In this course we’re going to build a full Isoparametric Finite Element solver. This unlocks our ability to model and analyse any 2D structural form.

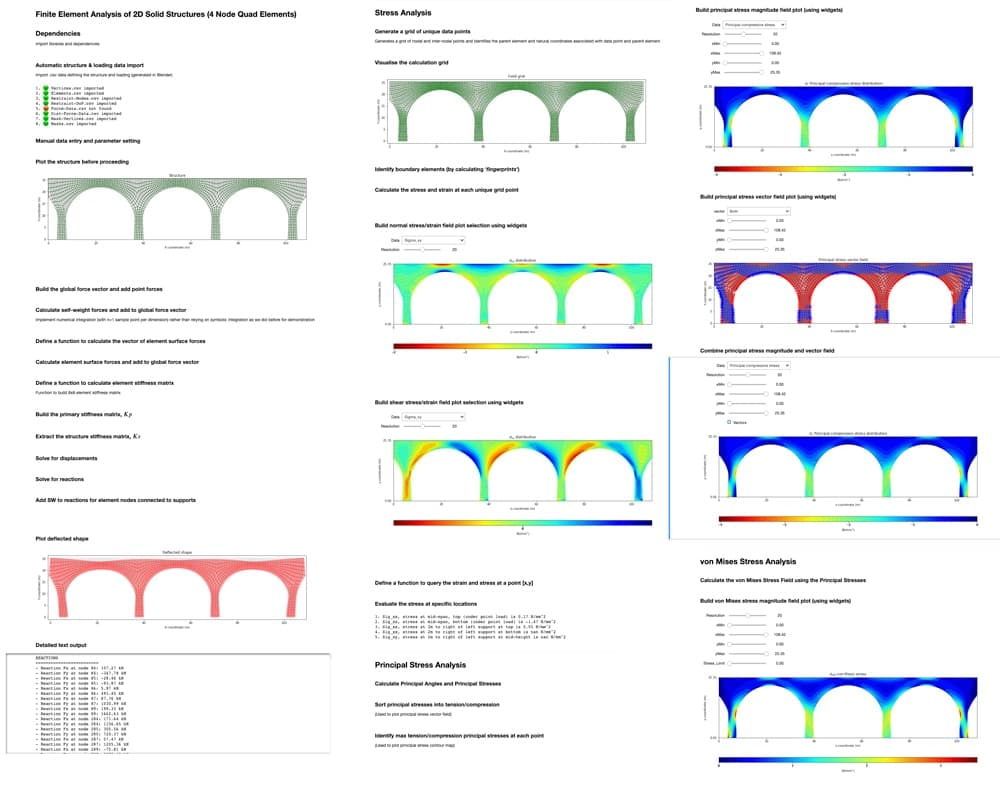
When we combine our finite element analysis solver with knowledge of the theory of plane stress and plane strain, this course will equip you with the ability to model 3D structures using 2D finite element models. When you complete this course you will have built your own 2D Finite Element solver, but more importantly, you’ll understand exactly how it works and what every single line of code does! Once complete, you can use your solver to show:
- deflected shapes
- normal stress and strain fields
- shear stresses and strains fields
- principal stress magnitudes fields
- principal plane orientations
- von Mises stress fields
We’ll build in the ability to simulate the influence of point load forces, distributed forces and body or self-weight forces. Once you complete this course you’ll have the knowledge, experience and confidence to extend your solver and add the new features that matter to you.
Analyse non-prismatic, realistic structural forms
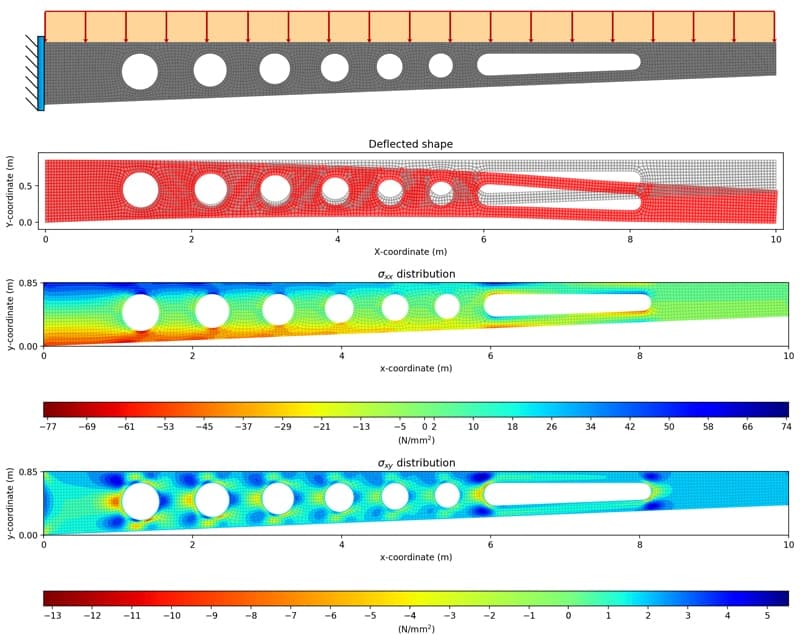
One of the barriers you quickly run into when trying to write your own finite element analysis tools is mesh generation. To do a finite element analysis we need mesh to analyse. For this task we’re going to use Blender. Blender is a powerful open-source 3D modelling tool. With only a handful of Blender’s modelling tools, we open the door to analysing the behaviour of any structure. We are limited only by our imagination!
With its intuitive modelling workflow and Python API, Blender is an excellent compliment to our structural analysis solver. To generate more complex meshes we’re going to leverage the power of the Blender plugin ecosystem and use a third party tool to generate FE meshes in just a few clicks.
We’ll develop our Python code using the versatile Jupyter development environment. When you complete this course you will have a standalone analysis Jupyter Notebook to deploy on your own projects. The code developed within each section of the course is also provided for download as a reference.
You DO NOT need to be a Python programming guru to take this course.
If you’ve taken the suggested prerequisite course – or even if you’re just familiar with basic programming ideas like functions, loops and variables that will be plenty to get you started. Programming should not be a barrier to taking this course!
I suggest that you take my 2D truss analysis course before this one if you’re not familiar with the basic concept of stiffness method analysis or matrix based analysis methods. Take a look at the ‘What you should cover before this course’ lecture in the course content list below for a brief discussion of assumed prerequisite knowledge.
I’ve also included an optional appendix to this course on the Fundamentals of 2D Stress Analysis.
This will provide all of the background knowledge required on the topic of 2D stress analysis for anyone not familiar with the basics of stress transformation equations, principal stresses, and principal planes.
Course Breakdown
Section 1: Welcome and Preliminaries
In this short introduction section I’ll set out a roadmap for the course and give you a sense of what to expect. This will give you a good idea of what we’re going to cover during this course. I’ll also briefly comment on assumed prerequisite knowledge – in other words what you should have covered before taking this course, and also what you don’t necessarily need to know. Both of the short lectures in this section can be watched below before enrolling – take a look.
Section 2: The Isoparametric Finite Element Method
In this section we’re going to cover the fundamental theory that the course is built on. We’ll start by introducing some fundamental concepts like shape functions and see how we can apply them when deriving the stiffness matrix for a simple bar element. Then we’ll build on this and introduce the 4 node quadrilateral (quad) element. The middle of this section focuses on the strain-displacement matrix which is a key part of determining the element stiffness matrix. We’ll finish up by explaining how to determine the equivalent nodal forces for self-weight and surface forces. We’ll nail down the basic approach and implement a simple example in this section.
Section 3: Gauss-Legendre Numerical Integration
In this section we’re going to introduce the Gauss-Legendre numerical integration scheme. This is a hugely valuable tool for complex integration and reduced the process down to a simple summation of terms. Like any numerical method, we’ll need to be mindful of how the accuracy of the technique is affected. So as well as demonstrating how to implement the scheme, we’re going spend some time understanding convergence and how to ensure accurate results. Once this section is complete – we’ve covered the bulk of the theory necessary to build our solver.
Section 4: Generating Structure and Mesh Data
To really leverage the power of the finite element analysis technique, we need an efficient way of building a structural mesh to analyse. For this task we’re going to use Blender which can be downloaded for free from Blender.org. There are a number of ways we could go about this, but very few options provide us with the convenience and flexibility of Blender.
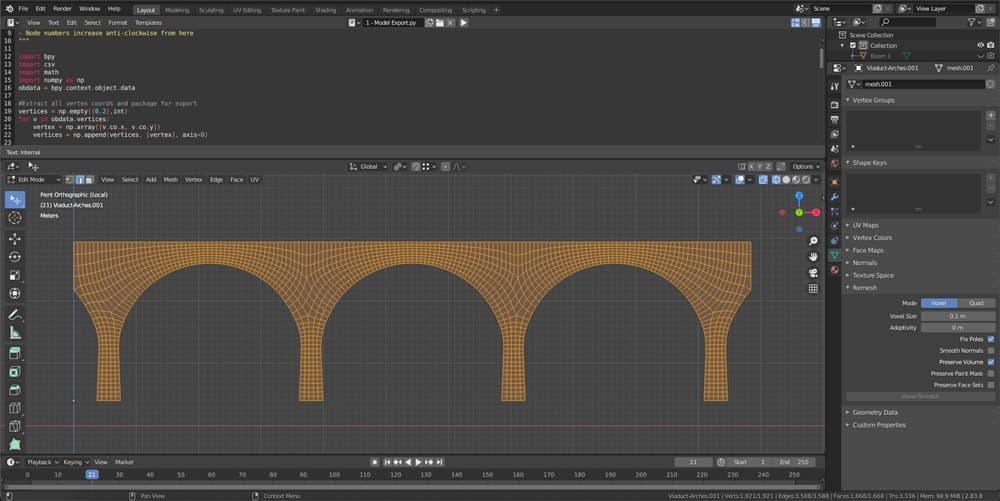
After modelling a simply supported beam we’ll generate a mesh across that structure and then write some code to capture the mesh definition and export it to a csv file. The final step in this section is to bring this data into our Jupyter Notebook – so we’ll write code that imports this data into our Jupyter Notebook ready for processing in the next section.
Section 5: Implementing the Isoparametric Finite Element Method
This is the section where it all comes together – all of the earlier theory and the mesh data we generated in the previous section. In this section we’re going to build the core of our solver. This means we’ll build the structure stiffness matrix and solve the system of equations that is the mathematical representation of our structure. We’ll round out the section with a validation exercise and compare the deflections from our finite element analysis with those from a simple Euler-Bernoulli deflection calculation. Completing this section is a key milestone in our development as we’ll have implemented the core solver.
Section 6: Visualising the Strain and Stress Fields
This section is about mining for the additional information embedded within our model. We’re going to focus on building stress contour maps that show us how the different stresses vary throughout the structure. Before working through this section, you might find it helpful to review the stress analysis lectures in the appendix. Particularly if you’re not familiar with the concept of normal and shear strains and stresses at a point and the purpose of stress transformation equations. We’ll finish this section with another validation exercise and compare the stress distributions from our finite element analysis with normal and shear stress distributions derived from fundamental beam theory.
Section 7: Implementing Area and Volume Forces
In this section we’re going to implement the ability for our code to simulate the influence of area and body forces. We’ve already implemented both of these calculations for a single element in section 2 – here we’ll just scale this up for our entire structure. We’ll start with body forces or self-weight. After this we’ll move on to surface forces. For surface forces we’ll start off in Blender by identifying the location and magnitude of our surface forces. Once these are defined in Blender, we’ll export this information into our notebook and set about building the functionality. Once this section is complete we’re about 75-80% complete and have a capable solver on our hands.
Section 8: Principal Stresses and von Mises stress:
This section is really about adding bells and whistles or polish to our solver in the form of Principal Stress and von Mises stress distribution plots. We’ll start off with a brief review of principal stresses. If you want to dig a little deeper on the topic before taking this section – jump down to the appendix where I cover principal stresses in more detail. After reviewing principal stress theory – we’ll calculate and then visualise the principal stresses and orientation of the principal planes. After this we’ll take a break from coding and discuss the von Mises failure theory. Once we have the concepts and key equations in hand, we’ll use our principal stress fields to calculate the von Mises stress field.
Section 9: Generating and Analysing Complex Meshes:
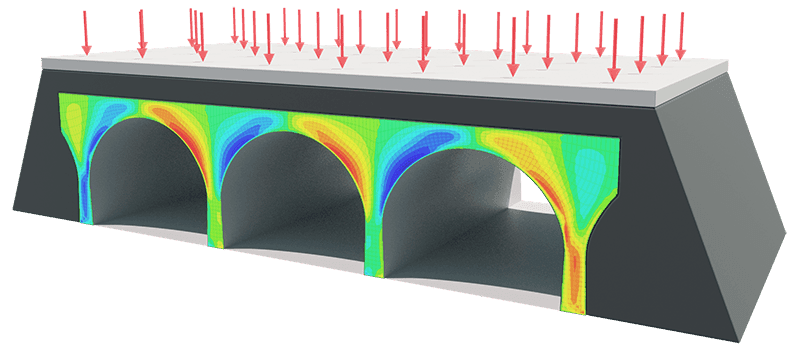
The power of the finite element method is its ability to accommodate non-standard or irregular structural shapes. But this requires us to mesh complex 2D geometries, so we need a more robust way of generating the finite element mesh for our structures. We’ll introduce two tools to achieve this in this section and make some amendments to our export code to work with our new more complex meshes. We’re going to base this section around an arched-viaduct structure. This will give us enough complexity to stress test our code and highlight areas that require attention before we can apply our code to more complex geometries.
Appendix: Fundamentals of 2D Stress Analysis and Mohr’s Circle:
To get the most from this course you need to have an understanding of 2D stress analysis – this way our stress contour plots will make a lot more sense. If you’re not familiar with this topic or you only have a vague recollection of the theory from dim and distant past – no problem! I’ve included an appendix, which is basically a whole second course on the topic of 2D stress analysis. In this appendix course, I’ll cover the fundamentals of normal stress, shear stress, principal stresses, principal planes and I’ll even discuss Mohr’s circle which is not strictly necessary – but still good to know!
Who this course is for
- Students and professional engineers who’ve studied matrix analysis methods and now want to learn how to analyse continuum structures (2D rather than linear structural elements).
- Students and professional engineers who want to better understand what’s happening behind the scenes of their ‘black box’ commercial finite element software.
- Students and professional engineers who’ve taken some or all of our previous direct stiffness method courses (see bundle discount at the bottom of this page) and want to continue learning and expanding their abilities.
- Anyone who wants to leverage programming as a tool for structural analysis or within their day-to-day study or work.
The codes developed in this course are for educational purposes only and are not tested or certified for use beyond the educational scope of this course. Always employ your own engineering judgement first and foremost, regardless of what the computer says!
Download your personalised Certificate of Completion once you’ve finished all course lectures.
Applying for jobs? Use your Certificate of Completion to show prospective employers what you’ve been doing to improve your capabilities.
Independently completing an online course is an achievement. Let people know about it by posting your Certificate of Completion on your Linkedin profile or workplace CPD portfolio.

