You can download the complete code for each lecture from the Resources panel at the top of each page (just below the video). This is a handy reference if you lose track of what code we've edited in the current lecture.
2.1 Initialising our VIKTOR app
Now that our development environment is running, we can create a new editor app by executing the following CLI command in the Codespace terminal,
viktor-cli create-app --app-type editor
This will populate the working directory with template code in app.py and files that are necessary for the cloud to turn your code into an app. Next, we need to install the app by running,
viktor-cli clean-start
We now have an app installed and running in our development environment. Our boilerplate app code is ready for us to start editing, Fig 1.
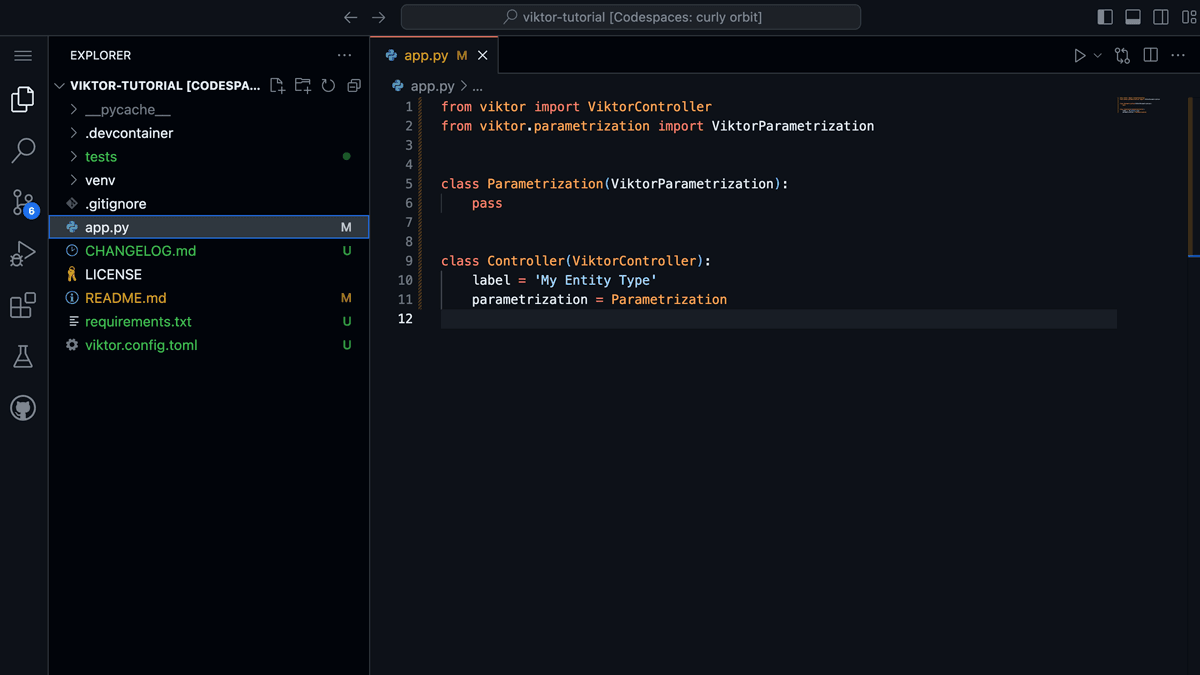
Fig 1. Boilerplate app running in the Codespace.
To access the app’s front-end during development, you can navigate to the development workspace in your VIKTOR account and click the Open button, Fig 2.
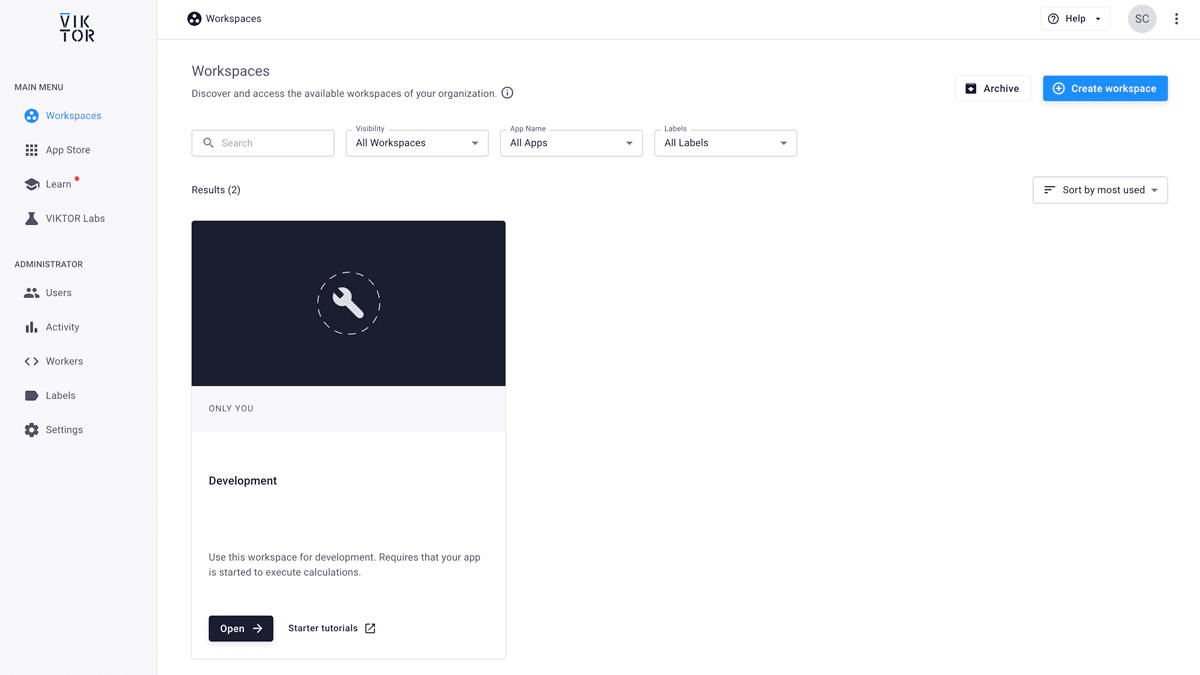
Fig 2. Workspaces in the VIKTOR platform. Click Open on the development workspace to open the app's front-end.
This will launch our app…which is currently just a blank window. At this point, we have a blank canvas and are ready to start building!
Note that if you stop your app or it crashes, you can start it again from the Codespace terminal with the command,
viktor-cli start
💡Now would be a good time for an initial commit to your Github repo.
If you know git and how to commit your code...skip this blue box.
If you’re new to git and Github, you can commit your code (basically, this means saving a snapshot of it) by running the following commands in the Codespace terminal,
git add .
git commit -m "Some helpful message, like...Initial commit"
git push origin main
Do this while your app is not running. Once it's done, you can start your app again with viktor-cli start.
It's a good habit to commit your code regularly as you work on your app. This way, if you make a mistake or something goes wrong, you can always revert back to a previous version of your code.
2.2 The basic structure of a VIKTOR app - the app.py file
A VIKTOR app is built around a single Python file, app.py. This file is where you define the structure of your app, including the layout, inputs, outputs, and the logic that connects them. Of course, we can have many additional files to support our app and help compartmentalise our code, but the app.py file is the core of our app.
By default, app.py has two classes;
ParametrizationController
The Parametrization (note the spelling - it's not parameterisation or even parameterization) class is where we define the layout of the app and any user input parameters.
The Controller class handles all of the calculations and is responsible for generating our data visualisations.
We can add components to our app, like NumberField, Text, Table etc. by importing them from the VIKTOR SDK. This tutorial will give you a sense of what components are available, but ultimately, when building your own app, you'll need to refer to the docs to identify the best components for what you're building.
To get our bearings, let’s start by setting up some tabs and sections that we’ll fill out as the build progresses. For our app, we would like,
- a Welcome tab: this could contain a welcome message and introduction to our app.
- A Data Input tab: this is where the user will specify the analysis parameters. This will be further subdivided into sections where the user can define,
- analysis constants
- the structure’s geometry
- the restraint information
- the applied loads
To define the app structure outlined above we make use of the Tab, Text and Section entities, imported from the SDK at the top of the app.py file. For now, we’ll simply use some “Hello World” filler text in each tab.
After adding these elements to the Parametrization class, your app.py file should look this:
app.py
from viktor import ViktorController
from viktor.parametrization import ViktorParametrization, Tab, Text, Section

class Parametrization(ViktorParametrization):
	#Tab 1
	tab_1 = Tab('Welcome')
	tab_1.text1 = Text("Hello World")

	#Tab 2
	tab_2 = Tab('Data Input')
	tab_2.section_1 = Section('Define Analysis Constants')
	tab_2.section_1.info = Text("Hello World")

	tab_2.section_2 = Section('Define Structure Geometry')
	tab_2.section_2.info1 = Text("Hello World")

	tab_2.section_3 = Section('Define Restraints')
	tab_2.section_3.info = Text("Hello World")

	tab_2.section_4 = Section('Define Applied Loads')
	tab_2.section_4.info = Text("Hello World")

	#Tab 3
	tab_3 = Tab('Results Export')
	tab_3.section_1 = Section('Export Results')
	tab_3.section_1.info = Text("Hello World")

class Controller(ViktorController):
	label = 'My Entity Type'
	parametrization = Parametrization
Now, make sure you app is running, it should say App is ready in your terminal, if it doesn’t, run viktor-cli start.
We can head over to our app’s front end now and refresh the page. You should see the skeleton structure we’ve outlined above, Fig 3.
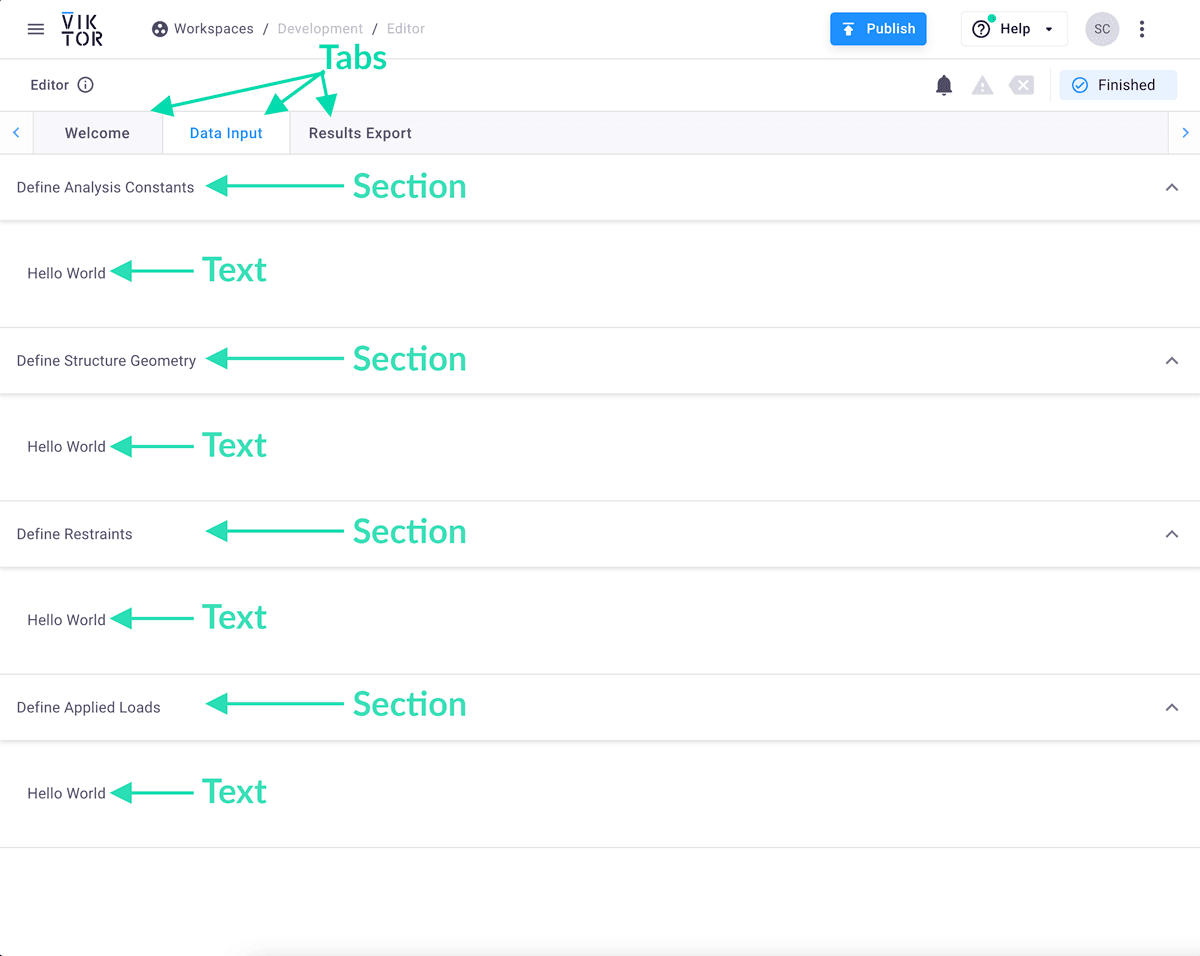
Fig 3. Initial structure of our app.
As we progress, we’ll expand this Parametrization class - for now it’s sufficient to simply understand that it’s where we set app (front end) structure and input parameters.
We won’t dig too deep into the Controller class just yet. For now, all we need to be aware of is that from inside this class, we can access all user-defined inputs from the Parametrization class and pass them as inputs to our calculations. The Controller class will also be responsible for everything that appears on the right-hand-side results section of our app’s front end.
Take another look at the finished version of the app we're building...
...the front end of our app or User Interface (UI) - the part the end user sees and interacts with, is divided in two; a left side and a right side when viewed on desktop and a top and bottom half when viewed on a mobile device.
We can think of the Parametrization as defining what appears in the left (top) side of the user interface (UI). This is where the user input is defined.
The right (bottom) half generally contains the results of our analysis. This is controlled by the Controller class. There may be edge cases to this heuristic - but it holds for most practical purposes.
In the next lecture, we’ll start to map out how we’re going to structure our truss analysis app within the Parametrization and Controller classes.